Sim Setup: Prepar3D/FSX/MSFS
Since you're here, you've probably gotten yourself a new simulator and want to configure STKP for use with it. This article covers setting up SimToolkitPro for use with Prepar3D, FSX or FS2020.
Topics Covered:
Local Setup
A local setup should be used when the simulator and STKP are on the same computer.

If your simulator and SimToolkitPro are on the same device, click the Connect To Sim button on the STKP Dashboard, then click the appropriate sim logo to enable the use of it. A blue tick mark shows the simulator is enabled.

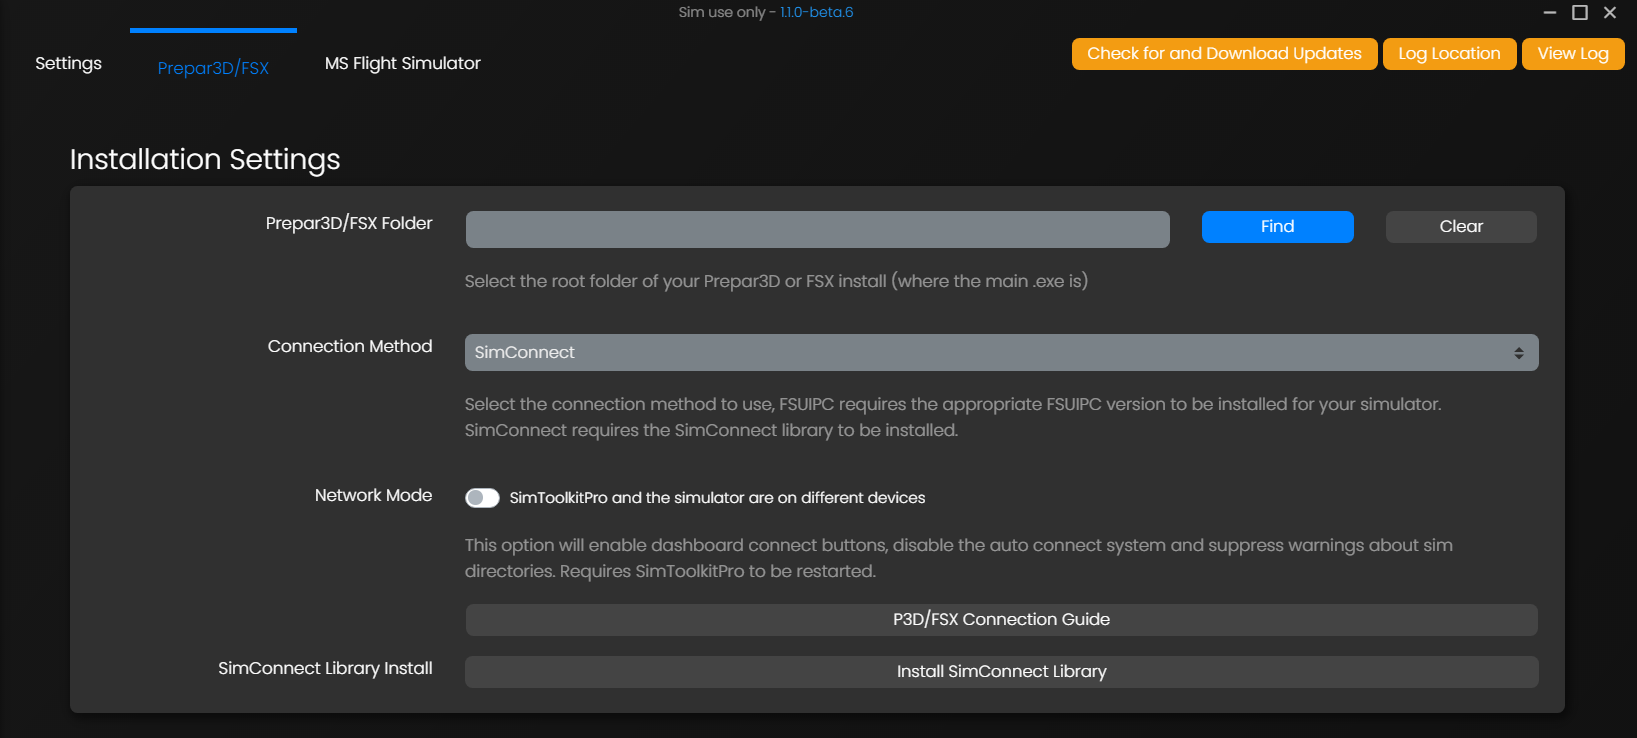
Now that the simulator is enabled, the Settings tab for it will be made available. Head to STKP Settings and look for a new Prepar3D/FSX tab that appeared at the top of the page (it will be labeled MS Flight Simulator in the case of FS2020) and switch to that. Now we need to tell SimToolkitPro where Prepar3D or FSX is installed (not mandatory for FS2020). It will try to auto detect the installation folder, but this isn't always possible or successful.

If SimToolkitPro was unable to find your folder, click the Find button to locate the directory manually. This should be set to the location of the Prepar3D.exe or FSX.exe file. With the folder selected and the Connection Method set to SimConnect, click the Install SimConnect Library button to install the connector applet. Before doing this, ensure that the simulator is not running and you have the rights to install programs on the computer. You may need to run SimToolkitPro as administrator to do this. During the installation, a small white box should pop up and depending on the capabilities of your computer, disappear relatively quickly. This is normal behavior.
With the Library installed, you should now be able to establish a connection between the sim and SimToolkitPro. Click the Connect Prepar3D/FSX or Connect FS2020 button on the Dashboard or the Flight Summary page.
Visting the Live Map (or the Flight Summary) page from the sidebar should now show an aircraft icon positioned at the location of your simulator aircraft.
With that, you are ready to fly!
Network Setup
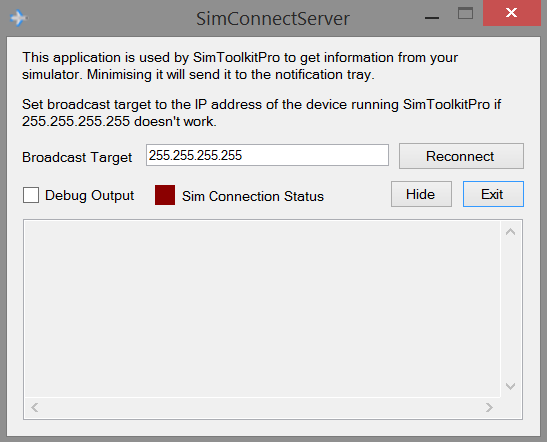
A network setup should be used when the simulator and STKP are on different computers. For this you'll have to download and extract the SimConnect Server from the bottom of the download page onto the simulator device. When you start your simulator make sure to run the server application as well.

The SimConnect server will show a small status icon for its connection state. Minimising the app or clicking the Hide button will send it to the notification area in the bottom right.

Once a simulator is detected the status icon will turn green. Any instances of SimToolkitPro on your network will now be able to connect to the simulator. In SimToolkitPro be sure to set Network Mode to on (the switch should turn blue) in the Settings. Doing this will prevent SimToolkitPro starting a connector instance locally and instead prepare it to receive data over the network.

If any issues occur, ensure that the SimConnect Library is installed on the simulator device, and if problems persist contact the Support Team using Discord.